Cleaning Business SOPs: 10 Free Templates for Your Team
Adapt ten complete cleaning procedures with a free editable library, printable examples, quality and training forms, and a blank product register.
 R Rashdi
·
July 2, 2026
·
24 MIN READ
R Rashdi
·
July 2, 2026
·
24 MIN READ
Quick answer
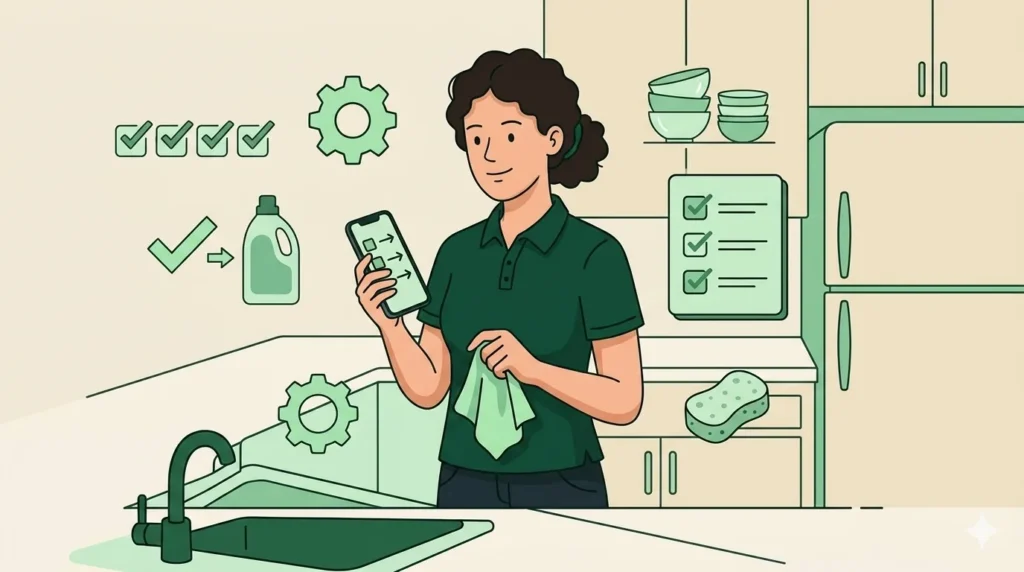
Cleaning business SOPs are written procedures that explain how to prepare, perform and check a task. This free library contains ten complete adaptable procedures for ordinary homes and small offices, plus a blank master, room examples, quality and training forms, and a product register. Fill in the site and product requirements and observe the team using the adapted procedure before assigning independent work.
A checklist records what was completed. A standard operating procedure (SOP) explains the method, its limits and what to do when something goes wrong. Use both: a procedure for the task and a checklist for the work agreed at each site. These templates help you document that process; they do not promise identical results, a fixed training time or certification.
Download the cleaning business SOPs and forms
| Free file | Contents |
|---|---|
| Full library: Word Full library: PDF | 14 pages: adaptation instructions, ten procedures, quality and training forms, an exception record and source notes. |
| Blank master: Word | One editable page to expand for your own task and site. |
| Bathroom PDF | One-page bathroom procedure from the library. |
| Kitchen PDF | One-page home-kitchen and office-kitchenette procedure. |
| Office closing PDF | One-page final walkthrough and lock-up procedure. |
| Quality form PDF | Done / Not in scope / Problem found, with notes and follow-up. |
| Training form PDF | Demonstration, observed practice, gaps, recheck and task sign-off. |
| Product register: Excel | Instructions and three blank product cards, each with 22 fields for verified use requirements. No formulas or macros. |
All nine files are free without signup. The Word files and spreadsheet are editable; the PDFs are printable, not fillable forms. Individual PDFs are exact extracts of the library and retain their library page numbers. Keep the full library alongside them because room procedures refer to the product and tool procedures.
In the product register, yellow cells marked Input are editable. Use one card per product and approved use, copy a blank sheet for more records, and expand row heights if longer entries need space. The workbook cannot approve a product or calculate safe dilution. Missing fields remain unresolved. A reasoned Not applicable decision is different from leaving a field empty.
Adapt a procedure before using it
- Confirm the site, task frequency, agreed service and exclusions. Identify the materials, occupants and actual hazards. Use a non-secret site reference on general forms.
- Complete the relevant fields from the actual current product label, safety data sheet (SDS) and surface or equipment instructions. Record where the crew can retrieve them.
- Have the responsible lead approve the site version, assign roles and establish the stop-and-report contact. Do not release a procedure with unresolved product or safety instructions.
- Demonstrate the actual method, observe practice and record gaps. Recheck the relevant steps before deciding which tasks the worker may perform independently.
- Keep the current version accessible and withdraw superseded copies. Review affected steps when the product, equipment, scope or site changes.
This pack covers ordinary home and small-office work. It excludes healthcare, commercial food operations, hazardous remediation and other specialist settings. It is a general adaptable resource, not a site-approved safety program or professionally reviewed compliance manual. Record site-specific time estimates if useful, but do not use a room-time target to override instructions or decide whether someone is trained.
Cleaning and disinfecting are different tasks. EPA explains that the product label determines permitted uses and contact time; for the applicable disinfection direction, the surface must remain visibly wet for the required time. These templates deliberately prescribe no universal dilution, contact time or PPE.
OSHA/NIOSH chemical-worker guidance supports accessible hazard information and training for the products actually used. It is older general guidance, not a current legal checklist. CDC’s community-facility guidance also distinguishes ordinary settings from facilities needing specialist procedures. Sources were checked September 23, 2026; verify actual product instructions when adapting the pack.
Jump to one of the ten procedures
- 1. Bathroom cleaning
- 2. Home kitchen and office kitchenette
- 3. Routine office cleaning
- 4. Product selection and approved disinfection
- 5. Cloth and tool separation
- 6. Complaint and agreed return visit
- 7. Keys and secure access
- 8. Damage and incident reporting
- 9. Restock, equipment and vehicle loading
- 10. Final walkthrough and office lock-up
1. Bathroom cleaning
Template version: 1.0, September 23, 2026. Add the site version, date and approver before use.
Purpose: Complete the agreed ordinary bathroom clean and leave a checked, usable room.
Scope and exclusions: Accessible fixtures, mirrors and floors in homes or small offices. Excludes sewage, sharps, bodily-fluid cleanup, mold remediation and high-access work.
Responsible role: Assigned cleaner; site lead reviews exceptions.
Preparation: Confirm occupancy, agreed tasks and existing damage; keep people and pets clear of the work area.
Tools: Dedicated bathroom cloths and toilet tool, suitable floor tool, approved products and specified PPE.
Complete before use: Site/rooms; fixture and floor materials; approved product/register IDs; label/SDS locations; required PPE; ventilation; any approved disinfection task.
Steps
- Check the site instructions and product entries before starting. If compatibility or an instruction is missing, pause that task and ask the lead.
- Set out bathroom-only tools. Remove ordinary loose waste by the agreed method without reaching into or compressing bin contents.
- Clean accessible mirrors, shelves and fixtures in the agreed sequence, using the recorded method for each material. Do not move personal items without permission.
- Clean sink and bath/shower surfaces, then the toilet using its dedicated tools. Keep toilet tools separate from other surfaces. Follow SOP 04 for any approved disinfection.
- Complete agreed floor work toward the exit, controlling access to wet areas. Return agreed items and consumables without contaminating cleaned surfaces.
- Inspect under normal room lighting, record unfinished work or damage, and release the room only when the floor and access route are safe.
Finish checks: Agreed surfaces have no visible loose soil or avoidable residue; fixtures are left as agreed; tools removed and exceptions recorded. Appearance alone does not establish disinfection.
Stop and report: Stop for unknown chemicals, missing PPE, unsafe surfaces, electrical hazards, sharps or contamination outside scope. Keep clear and notify the lead; use the site emergency process when needed.
Exception record: Record site, date, SOP version, incomplete task/reason, immediate action, lead notified and owner/recheck date.
Training check: Observe tool separation, surface-method selection and the final check; ask the trainee to demonstrate when they would stop.
2. Home kitchen and office kitchenette
Template version: 1.0, September 23, 2026. Add the site version, date and approver before use.
Purpose: Clean agreed accessible surfaces without extending the job into appliance servicing or specialist food sanitation.
Scope and exclusions: Ordinary home kitchens and office kitchenettes. Excludes commercial food operations, appliance interiors unless separately agreed, pest contamination and moving heavy appliances.
Responsible role: Assigned cleaner; site lead approves any scope change.
Preparation: Confirm cool, safely accessible work areas, food/personal-item arrangements and surface materials. Record existing damage before work.
Tools: Kitchen-only cloths, suitable non-damaging tools, floor equipment, approved products and specified PPE.
Complete before use: Site; surfaces/appliance models; manufacturer instructions; product IDs; food-contact restrictions and rinse requirements; excluded areas; waste route.
Steps
- Review the task list and product register. Clear only the items the client has agreed you may move; do not handle exposed food or private paperwork.
- Remove ordinary loose debris and empty agreed bins without compressing waste. Report sharp or unknown contents instead of reaching in.
- Clean accessible upper surfaces and appliance exteriors using the recorded manufacturer-compatible method; avoid controls, openings and live electrical parts unless specifically covered.
- Clean counters, backsplash and sink with the approved surface method. Follow recorded food-contact and rinse requirements; use SOP 04 only where a disinfection task is approved.
- Complete agreed floor work toward a clear exit. Keep used kitchen cloths separate from bathroom tools and clean supplies under SOP 05.
- Inspect surfaces and the exit route, replace authorized items, and record any excluded, unfinished or damaged area before handing back the room.
Finish checks: Agreed surfaces are visibly clean, no avoidable product residue remains, items are returned as agreed and the floor is safe for use.
Stop and report: Pause for hot equipment, an unidentified surface/product, a gas or electrical concern, pest waste or specialist contamination. Do not diagnose or repair appliances.
Exception record: Record missed task and reason, any scope request, person notified and agreed next action. Record actual time separately; no fixed room-time target overrides instructions.
Training check: Observe counter and appliance method selection, food-contact instruction checks, cloth separation and the exit inspection.
3. Routine office cleaning
Template version: 1.0, September 23, 2026. Add the site version, date and approver before use.
Purpose: Complete the contracted office tasks while protecting occupants, records and equipment.
Scope and exclusions: Ordinary offices, meeting rooms and shared areas. Restrooms use SOP 01; kitchenettes use SOP 02. Excludes clinical, laboratory, server-room and specialist tasks.
Responsible role: Assigned crew; site lead confirms area ownership and exceptions.
Preparation: Review the area/frequency list, occupancy, restricted rooms, clear-desk rules and access arrangements.
Tools: Approved vacuum/floor tools, area-assigned cloths, ordinary waste supplies, suitable products and specified PPE.
Complete before use: Site/area map; task frequencies; permitted desk surfaces; floor materials; product IDs; electronics instructions; restricted areas; waste streams.
Steps
- Check in through the approved access process. Confirm occupied rooms and place equipment where it will not obstruct people or escape routes.
- Empty only designated ordinary waste and recycling bins. Leave documents, confidential bins and unidentified items to the agreed authorized process.
- Clean permitted accessible surfaces in the recorded area sequence. Do not rearrange files, unplug equipment or open drawers to reach surfaces.
- Clean agreed touchpoints with their approved method. Electronics require the manufacturer's instructions and site authorization; do not spray into equipment.
- Complete the scheduled floor tasks with suitable equipment. Manage cords and wet areas, maintaining a safe route for occupants.
- Check the task list against completed areas. Record inaccessible desks or occupied rooms as exceptions, then hand over to SOP 10 for closure.
Finish checks: Scheduled areas checked; no avoidable debris or residue; waste handled as agreed; private items undisturbed and exceptions visible.
Stop and report: Stop for a restricted area, unsafe equipment, confidential material in the wrong waste stream, unknown spill or an occupant conflict. Contact the site lead.
Exception record: Record area/task, status, reason, access issue and lead action. Do not put sensitive document contents in the log.
Training check: Observe desk boundaries, waste identification, safe equipment routing and honest recording of an inaccessible area.
4. Product selection and approved disinfection
Template version: 1.0, September 23, 2026. Add the site version, date and approver before use.
Purpose: Ensure a task uses a verified product and method rather than a guessed chemical instruction.
Scope and exclusions: Ordinary authorized home/office surface tasks. Excludes specialist outbreaks, hazardous remediation, fogging and any use not covered by training and product instructions.
Responsible role: Lead verifies the product register; trained cleaner follows the approved task entry.
Preparation: Identify the surface and purpose: cleaning, sanitizing or disinfecting. Obtain the actual container label, current SDS and relevant equipment/surface instructions.
Tools: Approved labelled product, any specified measuring/application tools, timer where needed and required PPE.
Complete before use: Product identity/registration where relevant; use site; target claim; dilution or ready-to-use status; precleaning, wet contact time, rinse, ventilation, storage and PPE requirements.
Steps
- Match the actual container to the register entry. Verify the permitted use, material and intended task; a similar product name is not enough.
- Confirm required protection, ventilation, training and emergency information are available. Keep all product-specific blanks unresolved until verified; do not improvise.
- Prepare only as the label directs using the specified equipment. Do not mix cleaning products. Keep solution identity and preparation details available on the required label.
- Carry out the recorded cleaning/preparation steps. For approved disinfection, apply the product by its labelled method and keep the surface visibly wet for the full applicable contact time.
- Complete any specified rinse, drying or return-to-use requirements. Do not shorten the method to meet a visit-time budget.
- Close and store the product as instructed; handle tools and waste through the approved process. Record the actual method and any interruption.
Finish checks: The recorded task requirements were met, including any contact/rinse conditions. A photo or pleasant smell is not proof that disinfection occurred.
Stop and report: Stop for a missing label, incompatible surface, unknown mixture, exposure symptoms, unavailable protection or uncertain instructions; isolate the task and notify the lead.
Exception record: Record product/register version, task, date, deviations and corrective decision. Follow the site emergency plan and label/SDS response information for an exposure.
Training check: Have the worker locate the actual label/SDS requirements, explain the selected use and demonstrate the method under observation.
5. Cloth and tool separation
Template version: 1.0, September 23, 2026. Add the site version, date and approver before use.
Purpose: Keep used tools from being mistaken for clean tools or moved between incompatible task areas.
Scope and exclusions: Reusable and disposable tools for ordinary home/office work. Excludes contaminated sharps, bodily fluids and specialist laundry/decontamination.
Responsible role: Each cleaner separates tools; lead maintains the site's identification and laundry process.
Preparation: Check the agreed area labels or color key and the supply of clean tools. Colors are local choices, not a universal standard.
Tools: Identified area-specific cloths/tools, separate clean storage and used-tool containers, approved laundry/cleaning instructions and required PPE.
Complete before use: Local area/color key; toilet-tool identification; replacement points; laundry/manufacturer instructions; drying/storage method; disposable-waste route.
Steps
- Take clean tools from protected storage and assign them to the task areas shown in the site key.
- Keep toilet tools dedicated. Do not move a used bathroom cloth into a kitchen, desk or clean-supply area.
- Replace a cloth when the site method requires it or when visibly soiled; place it directly into the identified used-tool container.
- Keep clean stock separate during the visit and transport. Do not return a used cloth to clean stock or use an unidentified tool.
- Process reusable items according to the verified material and laundry instructions. Complete the specified drying before clean storage; dispose of single-use items through the agreed route.
- Check stock and containers after the job. Report any shortage, damaged tool or separation failure so affected work can be reviewed.
Finish checks: Clean, used and dedicated tools can be distinguished; reusable stock has completed its required processing and storage steps.
Stop and report: Stop affected work if no suitable clean tool is available, the area identity is lost or contamination falls outside ordinary scope. Ask the lead for an approved replacement/process.
Exception record: Record the separation failure or shortage, affected area, action and recheck owner; do not mark a replacement task complete before it is done.
Training check: Observe the worker choose the correct tool, segregate a used cloth and explain how a lost area label is handled.
6. Complaint and agreed return visit
Template version: 1.0, September 23, 2026. Add the site version, date and approver before use.
Purpose: Record a concern fairly, agree a response and verify any corrective work.
Scope and exclusions: Ordinary service-quality concerns. Injuries, property damage, security incidents or hazardous conditions also require SOP 08 and the relevant response process.
Responsible role: Designated service lead owns communication; assigned cleaner performs approved corrective work.
Preparation: Retrieve the agreed scope, visit record and current contact route. Review the actual service terms without assuming a universal refund or callback rule.
Tools: Concern record, task checklist, agreed communication channel and relevant room procedure for any return work.
Complete before use: Case reference; site/visit; concern; actual response commitment; agreed remedy; authorized contact; return scope; applicable product register IDs or Not applicable.
Steps
- Acknowledge the reported concern through the agreed channel. Record what the client says and the affected task without assigning blame.
- Check the scope and visit record, then ask only for information needed to understand the concern. Obtain permission before collecting any photo.
- Separate an omitted task from extra work or a changed expectation. Escalate uncertainty, damage or safety issues to the responsible lead.
- Agree the next action, owner and timing in writing. Confirm any charge, no-charge return or refund decision under the actual business terms.
- For a return visit, brief the cleaner on the exact authorized task and use the applicable current room/product procedure.
- Review the corrective task and communicate its outcome. Keep any unresolved concern open with a named owner and next contact date.
Finish checks: The agreed action and outcome are recorded; no unresolved item is silently labelled closed.
Stop and report: Stop routine resolution for threats, injury, suspected damage, a security breach or work outside trained scope; use the relevant escalation process.
Exception record: Keep facts, consented evidence, decisions, action owner, due date and client response. Limit access to those handling the case.
Training check: Role-play a scope disagreement; check factual notes, appropriate escalation and confirmation of the agreed next step.
7. Keys and secure access
Template version: 1.0, September 23, 2026. Add the site version, date and approver before use.
Purpose: Provide only authorized entry and maintain custody of keys or access devices.
Scope and exclusions: Agreed home/office access. Excludes forced entry, lock repair, sharing credentials publicly or changing site security settings without authorization.
Responsible role: Authorized key holder; access lead manages permissions and missing-device escalation.
Preparation: Verify the job, authorized personnel, access window and emergency/site contact using the approved secure system.
Tools: Approved secure access method, custody log and communication device. No cleaning products are used in this procedure.
Complete before use: Non-secret site reference; authorized role; secure instruction location; custody record; access-failure contact; return method. Never enter actual codes here.
Steps
- Obtain the assigned key/device through the approved handover and record who has custody. Keep it separate from public site/address information.
- Check the service window and authorized entry instruction. Do not enter on a changed instruction from an unverified person.
- Use only the agreed entrance and access method. Do not prop secured doors open or admit unknown people.
- If access fails, keep the site secure and contact the authorized lead. Record the delay and agreed action; do not force entry or guess alarm codes.
- Protect the key/device throughout the visit. Share access information only through the approved restricted method with authorized people.
- At departure, follow SOP 10 and return or secure the device as agreed. Record custody transfer and confirm any missing item immediately.
Finish checks: Entry and custody are accounted for, the site is secured as agreed and no access secret appears in an ordinary job note or public file.
Stop and report: Stop if identity, authorization or security instructions are unclear. Report a lost key/device or exposed credential immediately to the access lead; do not attempt unauthorized changes.
Exception record: Record reference, times, custodian, exception and authorized response without the secret itself.
Training check: Observe a mock handover and failed-entry response. Confirm the worker knows the secure instruction location and reporting contact.
8. Damage and incident reporting
Template version: 1.0, September 23, 2026. Add the site version, date and approver before use.
Purpose: Protect people, preserve factual information and route an incident to the responsible person.
Scope and exclusions: Reporting incidents noticed during ordinary work. This is not medical treatment, hazardous-spill cleanup, insurance advice or an investigation procedure.
Responsible role: Person discovering the incident reports it; site lead coordinates the authorized response.
Preparation: Know the site's emergency contacts, safe assembly route and incident record location before starting work.
Tools: Communication device, restricted incident form and relevant label/SDS information if a product is involved.
Complete before use: Site reference; lead/emergency contacts; reporting route; permitted evidence process; product/equipment ID if relevant, otherwise Not applicable.
Steps
- Stop the affected work and assess whether there is immediate danger from a safe position. Do not enter or remain in an unsafe area.
- For an emergency, use the site's emergency process and contact emergency services when needed. Give the location and facts; follow trained response instructions.
- Keep others away from the hazard when safe to do so and notify the lead promptly. Do not attempt an unfamiliar cleanup, repair or treatment.
- Record what was observed, where and when, who was notified and any action actually taken. Distinguish observations from assumptions about the cause.
- Preserve relevant records and any evidence only through the approved consent/privacy process. Do not move damaged items unnecessarily or post images publicly.
- Resume affected work only when the authorized responsible person confirms a safe, agreed plan. Record the decision and follow-up owner.
Finish checks: Immediate reporting is complete, affected work status is clear and responsibility for follow-up is assigned.
Stop and report: The incident itself triggers a stop for affected work. Escalate unanswered urgent calls through the site's emergency arrangements; do not wait for a routine message reply in danger.
Exception record: Use a restricted record for facts, notifications, instructions and recheck. Keep personal/medical details to the minimum required by the authorized process.
Training check: Run a tabletop scenario for damage and an unsafe spill. Check that the worker stops, reports facts and does not improvise a repair or cleanup.
9. Restock, equipment and vehicle loading
Template version: 1.0, September 23, 2026. Add the site version, date and approver before use.
Purpose: Start visits with suitable working equipment and controlled supplies, and return them safely.
Scope and exclusions: Ordinary cleaning kit inspection, stock checks and loading. Excludes electrical repair, hazardous transport decisions and maintenance beyond the worker's training.
Responsible role: Assigned kit custodian checks stock; lead arranges repair, replacement and transport requirements.
Preparation: Review the next visit's task list, equipment instructions, stock minimums and product storage/transport requirements.
Tools: Kit inventory, inspection tags, suitable secured storage and handling aids specified for the equipment.
Complete before use: Equipment ID/manual; inspection points; product/register IDs; refill/replacement rule; vehicle/load arrangement; defect contact.
Steps
- Compare required supplies with the next job's scope. Check container identity, condition and any relevant preparation/use-by information.
- Inspect equipment using the manufacturer's pre-use checklist, including the applicable guards, attachments, cables or battery condition. Keep defective equipment out of service.
- Restock only approved products and tools. Do not combine unknown residues, refill an unsuitable container or remove identifying hazard information.
- Plan lifting and loading for the actual weight and route. Obtain the required assistance or handling aid instead of attempting an unsafe lift.
- Place closed products and equipment in the approved vehicle/storage arrangement, secured against movement and separated as instructions require; keep exits and visibility clear.
- After use, clean/service only within training, report faults, return stock to its assigned place and record items needed for the next visit.
Finish checks: Required kit is present, identified and serviceable; defects are tagged/reported and the load meets the approved arrangement.
Stop and report: Stop for damaged electrical parts, leaking/unidentified containers, an unsafe load or a repair beyond training. Use a replacement approved by the lead.
Exception record: Record inventory shortage, defect/equipment ID, person notified and repair/replacement status. Do not mark a fault repaired without verification.
Training check: Observe a pre-use check, removal of a defective item from service and the agreed loading/handling method.
10. Final walkthrough and office lock-up
Template version: 1.0, September 23, 2026. Add the site version, date and approver before use.
Purpose: Check completed work and leave the site in the agreed safe and secure state.
Scope and exclusions: Ordinary home/office departure; this office example uses the site's authorized lock-up instructions. Excludes security-system repair or unauthorized setting changes.
Responsible role: Named closing lead; crew reports unresolved tasks before departure.
Preparation: Obtain the current area checklist, occupancy status, secure closure instructions and authorized contact.
Tools: Completed task list, quality form and approved access device. Cleaning-product fields are Not applicable unless corrective work is needed.
Complete before use: Site/areas; lead; closure responsibilities; lights/windows/doors to check; secure instruction location; occupants; escalation contact. No codes in this form.
Steps
- Walk the agreed areas against the task list. Mark Done, Not in scope or Problem found; record why anything remains unfinished.
- Check for tools, waste and avoidable residue. Confirm wet areas and access routes are safe before removing controls or releasing the space.
- Review bathrooms and kitchenettes against their finish checks. Correct ordinary missed work only within the approved scope and product procedure.
- Confirm all crew members, equipment and authorized occupants are accounted for. Follow the agreed light, window and door responsibilities without disturbing equipment the client needs left on.
- Apply the site's authorized lock/alarm sequence and confirm the expected indication. If confirmation fails, contact the lead; do not assume the site is secure.
- Record departure, closure result and key/device custody. Send the agreed handover with open issues and a named follow-up owner.
Finish checks: Work status and exceptions are recorded, the agreed closure indication is confirmed and access-device custody is accounted for.
Stop and report: Stop departure closure if a person is unaccounted for, a leak/unsafe area remains or the security indication fails. Escalate to the authorized contact and follow their safe instructions.
Exception record: Record time, areas checked, exception owner, closure result and notification. Keep access secrets and private paperwork out of the handover.
Training check: Observe a walkthrough and simulated alarm/lock confirmation failure; verify that an unresolved task or security issue stays visible.
Train by observing the actual task
Use the training form to record what the worker demonstrated, which step needed help and what happened at recheck. An acknowledgement that someone read a page is not the same as observing them choose the right method, perform it and recognize a stop condition. Adjust the instruction to language and terms the worker understands.
A worker might be ready for one ordinary task while still needing supervision for another. Record those limits explicitly. There is no universal number of days or successful photographs that establishes readiness. Use the cleaning staff training guide to connect the procedures to your broader onboarding process.
Keep exceptions and revisions visible
On the quality form, choose Done, Not in scope or Problem found for each item. Explain the last two and assign an owner and next action to unresolved work. For example, an occupied meeting room may be inaccessible at the agreed time. Record that fact and the authorized next step instead of marking the entire office clean complete.
The library includes an exception and revision record: site reference, SOP version, observed issue, immediate action, notification, work status, owner, recheck and closure decision. If a procedure changes, record the new approver and version, brief affected workers and withdraw old copies. Keep sensitive incident details in the authorized restricted system.
For a recurring missed task, review the agreed scope, method, tools and training before choosing a correction. The quality-control guide and client-complaint guide provide related workflows. A record or photo can help a review, but it does not by itself prove disinfection or explain the cause of a defect.
Questions about cleaning SOPs
What is the difference between a cleaning SOP and a checklist?
An SOP explains preparation, method, checks, limits and exception handling. A checklist records the agreed tasks and their status at a particular site. Use the two together.
Are all ten procedures included in the free files?
Yes. The full Word and PDF library contains all ten procedures, adaptation instructions and supporting forms. Individual bathroom, kitchen and office-closing PDFs are extracts from the same library.
Can I use the templates immediately on a client site?
Adapt and approve them first. Complete applicable site and product fields, verify actual instructions and train the people assigned to the work. Unresolved information is a reason to pause the affected task.
Does every disinfectant need the same contact time?
No. Use the actual label directions for the intended product, surface and use. Do not substitute a generic time or shorten it to meet a visit target.
Is there a universal cloth color system?
This pack uses a locally documented area key. Clearly identify dedicated tools, teach the chosen assignments and keep used tools separate from clean stock.
Does the training form certify a cleaner?
No. It records demonstration, observed practice, gaps, recheck and the lead’s task-assignment decision. It is not an external certification.
When should I update an SOP?
Review it when the scope, site, product, equipment or relevant instructions change, or when an incident or repeated issue shows a gap. Keep a named owner and a chosen review date.
Can these templates cover specialist settings?
No. Healthcare, commercial food operations, hazardous remediation and other specialist work require appropriate separate assessment, training and procedures.
Keep the current method where the crew can find it
The downloads work without CleanerHQ. If software would help keep job instructions available, compare the current field app, recurring service sets and cleaning business software with your actual workflow. Storing a checklist in software does not replace the site assessment, product instructions or observed training.

Written by
Rashdi has spent 15+ years building and managing enterprise software, and has worked with US cleaning businesses since 2006. He founded CleanerHQ.